
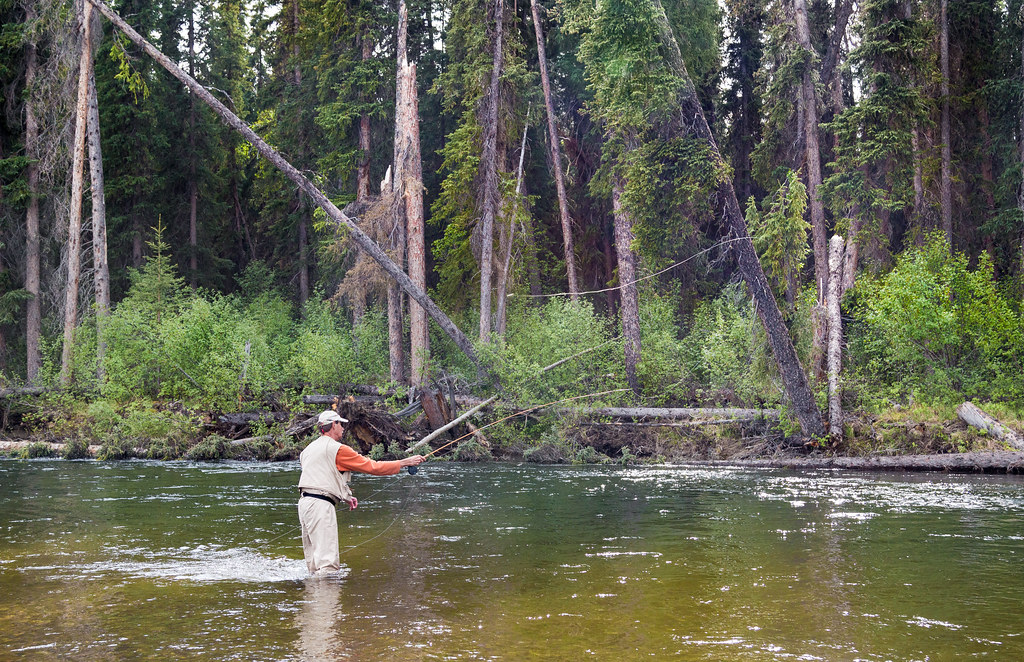
Strike indicators are indispensable tools for fly fishing enthusiasts aiming to improve their success on the water. By understanding how to effectively use strike indicators, anglers can enhance their ability to detect subtle takes and increase their catch rate. This article provides valuable insights into using strike indicators in various fishing conditions, from surface currents to deeper waters.
In this comprehensive guide, you will learn about the different types and sizes of strike indicators, as well as the importance of adjusting depth and weight according to specific fishing situations. Discover how to choose the right indicator color and glow for optimal visibility in different light conditions. We will explore techniques for properly positioning strike indicators on your leader line and adjusting them based on water currents.
Whether you’re a beginner or an experienced angler looking to refine your fly fishing skills, this article will equip you with the knowledge needed to effectively use strike indicators and maximize your chances of landing that trophy fish.
Strike Indicators in Fly Fishing
Purpose and Advantages
Strike indicators play a crucial role in fly fishing, helping anglers detect even the most subtle strikes from fish. By serving as visual cues, they allow for precise control of the depth and drift of your fly. This increased control significantly enhances your chances of hooking fish and reduces the number of missed opportunities.
Key Strategies for Detecting Strikes
To effectively use strike indicators, pay close attention to any sudden movements or pauses in their motion. These indicators are designed to be sensitive and respond quickly to even the slightest touch from a fish.
By keeping a watchful eye on these subtle changes, you can promptly react and set the hook when necessary. It’s important to experiment with different indicator sizes and styles to find what works best for you and maximizes your ability to detect strikes.
Adjusting Techniques to Changing Conditions
Adapting your indicator setup based on water conditions is essential for successful fly fishing. Factors such as depth, current speed, and clarity should all influence how you adjust your setup. For example, in deeper waters, you may need to increase the distance between your indicator and fly to ensure it reaches the desired feeding zone of the fish.
On the other hand, if the water is shallow or clear, reducing this distance can prevent spooking wary fish. Furthermore, using adjustable indicators that can be easily moved up or down the leader allows for quick adjustments based on changing conditions.
Different Types of Strike Indicators
Exploring Indicator Varieties
There are several types of strike indicators that fly anglers can choose from to enhance their fishing experience. These include yarn, foam, and buoyant materials. Each type has its own unique advantages and disadvantages, so it’s essential to experiment and find the one that suits your fishing style best.
Yarn indicators are popular among fly fishermen due to their versatility. They come in various sizes and colors, allowing you to adjust the indicator according to the water conditions and visibility requirements. Yarn indicators also provide excellent sensitivity, making it easier for anglers to detect subtle strikes.
Foam indicators, on the other hand, offer exceptional buoyancy. They float high on the water’s surface, increasing visibility even in rough or choppy conditions. Foam indicators are particularly useful when fishing with heavier flies or in fast-moving currents where traditional yarn indicators may struggle to stay afloat.
Buoyant materials like cork or inflatable balls are another option for strike indicators. These materials provide excellent visibility and can be easily adjusted for different depths by adding or removing weight. However, they may not be as sensitive as yarn or foam indicators when detecting delicate strikes.
Popular Choices and Alternative Options
Thingamabobbers, Air-Lock Indicators, and New Zealand wool indicators often top the list. Thingamabobbers are highly visible and easy to attach to your leader line with a simple loop system.
Air-Lock Indicators feature a unique locking mechanism that ensures they stay securely in place throughout your fishing session. New Zealand wool indicators offer excellent sensitivity while remaining lightweight and easy to cast.
In addition to these popular options, there are alternative choices that can be used as makeshift strike indicators when needed. Dry flies make an excellent substitute since they float on the water’s surface just like traditional strike indicators but also attract fish with their enticing appearance. Small balloons can also be inflated and attached to your leader line, providing a visible indicator that can be adjusted for different depths.
Materials and Colors in Indicator Systems
Strike indicators come in various materials and colors to suit different fishing conditions.Yarn and foam are commonly used due to their buoyancy and visibility. Yarn indicators are often made from synthetic materials like polypropylene or acrylic, while foam indicators are typically constructed from closed-cell foam.
In terms of colors, fluorescent orange, chartreuse, and white are popular choices for strike indicators. These vibrant colors offer excellent visibility against various water and lighting conditions.
Rigging Up a Strike Indicator
Essential Knots and Attachments
To properly rig up your strike indicator for fly fishing, it’s important to learn how to tie essential knots. The improved clinch knot or loop-to-loop connection are commonly used for attaching the indicator to the leader.
These knots ensure a secure attachment that will withstand the force of casting and fishing. You can use small rubber bands or toothpicks to further secure your indicator in place, preventing it from sliding along the leader during your cast.
Placement on the Fly Line
The placement of your strike indicator is crucial for effective fly fishing. You want to position it at a distance that allows your fly to reach the desired depth in the water. Consider the weight of your fly when determining where to place the indicator on your leader.
If you’re using a heavier fly, you may need to adjust the placement accordingly so that it doesn’t drag too much in the water. Experiment with different positions along the leader until you find the optimal placement that allows for proper presentation and control of your fly.
Setting Up for River Fly Fishing
When setting up your strike indicator for river fly fishing, there are a few factors to consider. Firstly, take into account the flow rate and depth of the river. In faster-flowing rivers, it’s advisable to use longer leaders and heavier indicators.
This helps maintain stability and ensures that your indicator stays visible amidst turbulent waters. Secondly, position your strike indicator slightly upstream from where you plan on fishing. This allows for a more natural drift as your fly moves downstream towards potential fish targets.
By adjusting these variables based on specific river conditions, you increase your chances of success while river fly fishing.
Remember that strike indicators come in various forms such as yarn indicators, rigs with bubble indicators or bobbers – each offering unique benefits depending on different scenarios.
Nymph Fishing with Strike Indicators
The Role of Entomology
Understanding insect behavior and life cycles is crucial. By observing the water surface, you can look for signs of insect activity such as hatches or rising fish. This information helps you determine the right time to use strike indicators.
Matching your fly pattern to the prevalent insects in the water increases your chances of success. By imitating the insects that trout are actively feeding on, you can entice more bites.
When to Use Indicators for Nymphing
Nymphing with strike indicators is particularly effective when fish are feeding near the bottom. These indicators allow you to detect subtle strikes that may go unnoticed otherwise. Slow-moving sections of rivers or deep pools where fish tend to hold are ideal spots for using indicators. In these areas, trout often feed on nymphs close to the riverbed, making it essential to have a visual cue like a strike indicator.
Indicators can also be beneficial in murky water or during low-light conditions when visibility is limited. By using a brightly colored indicator, you increase your chances of spotting any movement or hesitation in its drift, indicating a potential bite from a trout.
Remember that successful nymph fishing requires patience and observation skills. Keep an eye out for any changes in water currents or rises in fish activity as they could indicate an opportunity for using strike indicators effectively.
Tips and Tricks for Effective Use
Best Practices for Indicator Placement
Proper placement is crucial. To maximize your chances of detecting strikes quickly, place the indicator close enough to the fly without spooking the fish. Adjusting the depth of your indicator is essential and should be based on the water’s depth and the feeding zone of the fish. Remember to keep your indicator visible but not overly conspicuous to avoid alarming fish.
Techniques for Successful Fly Fishing Trips
To make your fly fishing trips more successful, there are a few techniques you should master. One important technique is mending your line. By skillfully manipulating your line’s position on the water, you can achieve a natural drift and prevent drag on your fly. This will increase its effectiveness in enticing fish to bite.
Accurate casting is another key technique that can greatly improve your chances of success. Take the time to practice and refine your casting skills so that you can consistently land your fly in the desired target area. This will increase your chances of presenting the fly in a way that appears natural to the fish.
In addition to mastering these technical skills, developing a keen sense of observation is crucial when using strike indicators. Pay close attention to any subtle movements or changes in behavior from your indicator as this could indicate a strike or other important information about what’s happening beneath the surface.
By combining these techniques with proper indicator placement, you’ll be well-equipped for successful fly fishing trips. Remember that practice makes perfect, so don’t get discouraged if it takes time to master these skills. With patience and persistence, you’ll become more proficient at using strike indicators effectively.
Adjusting Your Indicator System
Selecting the Right Colors
There are a few things to consider. One important factor is choosing colors that contrast with the water’s color, as this will enhance visibility. For instance, if you’re fishing in clear water, using bright indicators like chartreuse or orange can make them stand out against the background. On the other hand, when fishing in murky or stained water, opting for darker colors like black or red may be more effective.
In addition to considering water clarity, it’s also crucial to think about lighting conditions. In low-light situations such as early mornings or late evenings, using brighter indicator colors can help you see them better.
This is especially important when fishing in shaded areas or under tree cover. By experimenting with different colors and observing how they perform in various fishing situations, you’ll be able to determine which ones work best for you.
Factors to Consider for Setup
Setting up your indicator system correctly plays a significant role in successful fly fishing. Several factors should be taken into account when adjusting your setup:
- Fly Weight: The weight of your fly affects how deep it sinks and how much resistance it creates in the water. Consider using heavier indicators for heavier flies to ensure proper buoyancy and sensitivity.
- Leader Length: The length of your leader determines how far away from your fly line the indicator will sit. Longer leaders allow for more natural drifts but may require adjustments to maintain proper control over your presentation.
- Water Depth: Adjusting the distance between your indicator and fly is essential based on the feeding zone of fish at different depths. If fish are actively feeding near the surface, keep a shorter distance between them; if they’re deeper down, increase the gap accordingly.
To fine-tune your setup further:
- Use adjustable indicators that allow easy movement along the leader, enabling you to adapt to changing conditions quickly.
- Add or remove split shot weights above the fly to achieve the desired depth and drift control.
By considering these factors and making necessary adjustments, you can optimize your indicator system for different fishing scenarios. Remember that practice and experimentation are key in finding the perfect setup that works for you.
Video Guide and Digital Tools
Mastering Techniques with Visual Aids
To become proficient in using strike indicators for fly fishing, it’s helpful to utilize instructional videos or diagrams. These visual aids provide valuable insights into the proper techniques of casting, mending, and detecting strikes.
By watching experienced anglers demonstrate these skills, you can enhance your understanding and implement effective strategies more easily. Whether you’re a beginner or an experienced angler looking to refine your technique, visual aids can be invaluable in mastering strike indicator techniques.
Enhancing Experience with Digital Resources
In addition to video guides, there are various digital resources available that can enhance your fly fishing experience. Online forums, blogs, and websites dedicated to fly fishing offer a wealth of tips and insights from seasoned anglers. By exploring these platforms, you can gain valuable knowledge about specific rivers, flies, and techniques that work best for different conditions. Engaging with online communities allows you to connect with fellow anglers who share their experiences and advice.
Moreover, smartphone apps have revolutionized the way we approach fly fishing. There are now applications available that provide real-time river conditions, hatch information, and fishing reports. These tools enable you to stay updated on the latest developments while on the go. You can access detailed maps showing productive areas along the river and receive notifications about changes in water levels or hatches. With this digital assistance at your fingertips, you can make informed decisions about when and where to fish based on current conditions.
By incorporating both video guides and digital tools into your fly fishing journey, you can significantly improve your strike indicator techniques. The visual demonstrations offered by videos help solidify concepts in your mind while allowing you to observe proper execution firsthand. Likewise, digital resources keep you well-informed about prevailing conditions so that you can adjust your approach accordingly.
Remember that practice is key when learning any new skill—fly fishing included—and utilizing visual aids alongside digital resources can accelerate your progress. So, make the most of instructional videos, diagrams, online communities, and smartphone apps to enhance your understanding and application of strike indicator techniques. Happy fishing!
Additional Fly Fishing Essentials
Choosing the Right Equipment
Investing in quality fly fishing equipment is crucial for a successful and enjoyable fishing experience. Start by selecting a high-quality fly rod, reel, line, and leader that suit your fishing style and target species. Having the right equipment will enhance your casting ability and increase your chances of landing fish.
It’s wise to have a variety of options in your tackle box. Different fishing scenarios may call for different types of strike indicators. Some anglers prefer yarn indicators for their sensitivity, while others opt for foam or plastic indicators that are more buoyant and visible on the water’s surface. By having a selection of strike indicators at your disposal, you can adapt to changing conditions and improve your chances of detecting subtle strikes.
Exploring Top Fishing Locations
To make the most of your fly fishing adventure with strike indicators, it’s important to choose the right fishing locations. Research popular fly fishing destinations known for their abundant fish populations. Look for rivers, lakes, or streams that offer favorable conditions for nymphing with strike indicators.
Consulting local fishing guides or fellow anglers can provide valuable insights into prime fishing locations. They can recommend specific spots where fish are likely to gather and feed on nymphs near the surface. By targeting these areas with properly placed strike indicator rigs, you’ll increase your chances of hooking into some trophy-worthy fish.
Further Learning and Improvement Resources
Even experienced anglers can benefit from continuous learning and improvement in their fly fishing skills. Consider attending fly fishing workshops or seminars led by experienced instructors who can teach you advanced techniques specific to using strike indicators effectively.
Reading books and magazines dedicated to fly fishing is another great way to expand your knowledge base. These resources often cover various techniques, strategies, and equipment recommendations related to using strike indicators in different situations.
For hands-on learning experiences, participating in guided fishing trips can be invaluable. Professional guides can provide valuable insights and teach you practical skills while fishing in real-world scenarios. Take advantage of their expertise to fine-tune your strike indicator techniques and improve your overall fly fishing proficiency.
Conclusion
In conclusion, strike indicators are invaluable tools for fly fishing enthusiasts. Understanding the different types of strike indicators and how to rig them up properly can greatly enhance your nymph fishing experience. By adjusting your indicator system and using tips and tricks for effective use, you can increase your chances of detecting strikes and landing more fish.
To further improve your skills in using strike indicators, it is recommended to explore video guides and digital tools available online. Make sure to have all the necessary fly fishing essentials in your tackle box. By incorporating these techniques and tools into your fly fishing routine, you can elevate your success on the water.
Now that you have a comprehensive understanding of strike indicators, it’s time to put your knowledge into practice. Get out there, experiment with different techniques, and enjoy the thrill of fly fishing with strike indicators. Happy fishing!